
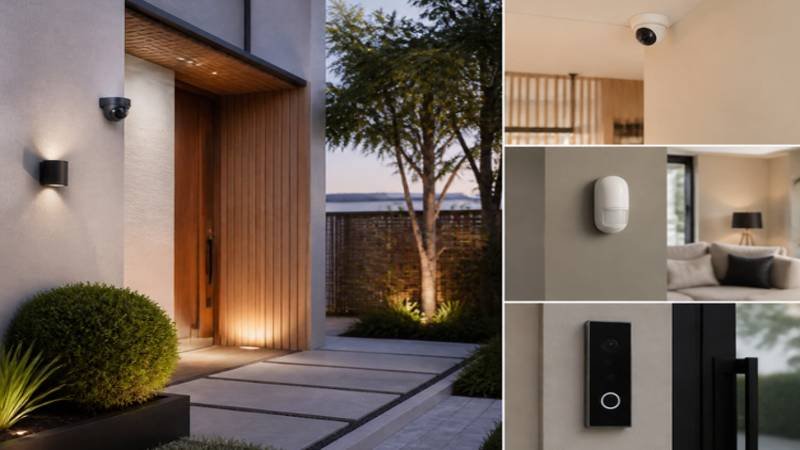
The tidiest-looking security setups are rarely the ones that hide equipment best. They are the ones planned around where each device has to work, then dressed in finishes that suit the room. That is the starting point for the most useful home security design ideas, especially if you are renovating and can still decide where cables, keypads and cameras will sit.
This guide covers how to choose complementary finishes and position cameras, alarm controls, wireless sensors and intercoms so they look deliberate without losing coverage or becoming awkward to use. It also explains clean cable routing, where concealment must stop, and a short handover checklist to use before you sign off the finished job.
How to Make Your Home Security Look Good: Blending Cameras, Alarms and Intercoms into Your Interior and Exterior Design
Home security design ideas start with a placement plan
Begin with a simple floor plan rather than a product catalogue. Sketch the entrances, gates, approach routes and the paths people take through the house, then mark the views and detection areas you need. Only then look for mounting positions that are also visually convenient, because doing it the other way round is how blind spots get designed in.
Add the furniture, curtains and planting you intend to have, since a sofa or a fast-growing shrub can undo a good position. Stand in the doorway and at the main seating areas and ask what each device can actually see from where it is proposed.
Then choose factory finishes with concrete pairings in mind: white door and window contacts against white frames, dark camera housings against a charcoal fascia, or a brushed-metal intercom panel beside brushed-metal door hardware. Compare size and projection as well as colour. A shallow keypad beside a door architrave often looks tidier than a bulky unit centred on an empty wall, but confirm it suits your needs before settling on the smallest profile.
Follow exterior architectural lines without losing camera coverage
Eaves, soffits and garage edges give cameras a natural mounting line, and a housing and bracket in a finish that sits quietly against the background will look better than treating every camera as a feature. Function should settle the final position, though. A camera tucked too high beneath an eave may capture the tops of heads rather than faces, so let the view you need decide the height and angle, even if symmetry suffers.
Check night-time performance at the proposed spot. Nearby walls and soffits can bounce back infrared light, and entrance lights or headlights can cause glare, so keep the lens clear of architectural edges. Choose equipment rated for its exposure, because shelter under an eave is not a substitute for outdoor suitability, and leave safe access for cleaning and adjustment too.
Never hide lenses behind planting, decorative screens or ornaments. If planting is nearby, allow for its growth so the viewing area stays open.
Keep keypads and wireless sensors tidy within interior sightlines
Group the alarm keypad with related controls near the entrance you use every day, sharing an edge or centreline with consistent spacing where practical. It should be easy to reach and read, and clear of any door that swings open.
Align door and window contacts neatly with their frames, following the manufacturer’s orientation and gap requirements. If the colour is wrong, choose a compatible factory colour rather than covering the contact with decorative trim.
Position motion detectors to cover the routes people actually walk, at the height the manufacturer specifies, and keep furniture, curtains and shelving out of their detection area. A corner that is merely less noticeable is the wrong choice if it compromises coverage.
Wireless sensors reduce visible cabling, but they still need reliable communication, sensible placement and room to open the casing when batteries need replacing. Do not bury them behind furnishings or decoration.
Keep keypads and wireless sensors tidy within interior sightlines
Make the intercom part of the entrance composition
Treat the outdoor panel as part of the entrance. A slim black panel can echo black gate bars, while a brushed-metal one can repeat the finish of a metal handle. Place it deliberately beside the entrance rather than wherever cable routing happens to be easiest.
Alignment must not override use, though. Visitors need to reach the call button comfortably, and the camera, positioned according to the manufacturer’s guidance, should capture faces rather than a gatepost or strong backlight. Keep the microphone and speaker unobstructed, and test speech clarity with the door or gate in its normal position and typical outdoor noise present.
Indoors, align the monitor with the keypad or nearby switches where their requirements allow, leaving enough separation and an easy viewing position. Check for reflections that make the screen hard to read.
Plan the clean finish, then test it before handover
Agree cable routes before plastering, painting or fitting joinery, and discuss accessible roof or wall cavities with the installer. Where concealed routing is impractical in an existing home, use neatly aligned surface conduit in a complementary finish. For Perth homeowners, a professional security installation provider such as Smart Security can be consulted about device positions and discreet cable routing before decorating begins, although what is achievable still depends on a site assessment.
Keep a clear line between hiding cables and hiding equipment. Recess only devices designed for manufacturer-approved recessed mounting, preserve service access, and leave specialist electrical work to suitably qualified professionals. Never paint or cover lenses, detector sensing surfaces, microphones, speakers or ventilation openings, and treat any cosmetic change to a housing as off limits without explicit manufacturer approval. Factory finishes are the simpler route. See more.
Before handover, work through this checklist:
- Check camera views with someone approaching, by day and again after dark.
- Walk-test motion coverage and open and close every door and window contact.
- Test intercom calling, speech clarity and the visitor camera view.
- Confirm everyone in the household can comfortably operate the controls.
- Make sure lenses, batteries, cable access points and service covers can still be reached.
Resolve any coverage or maintenance compromise before you sign off the finished layout.