
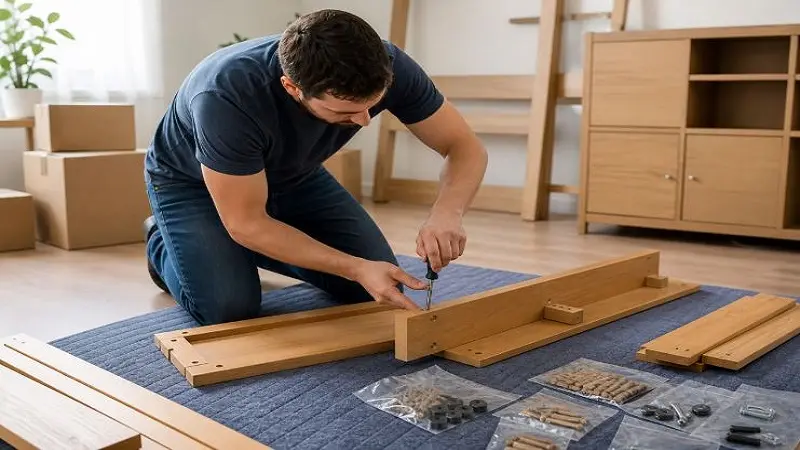
Knowing how to dismantle furniture for moving starts with deciding what can safely stay in one piece, rather than taking every item back to its original flat-pack parts. Every screw you remove is a joint you have to rebuild, and each rebuild is a chance to loosen a fixing hole, chip a lacquered edge or lose the one bracket that holds a styled room together.
This guide shows you how to choose the minimum dismantling each piece needs, protect decorative finishes while you work, keep fixings organised, and rebuild furniture safely in its new room. It also explains where sensible DIY ends and professional help should begin.
How to Disassemble and Reassemble Your Furniture Before a Move Without Damaging It (and Which Pieces Are Worth Taking Apart)
Decide what needs dismantling, and what should stay intact
Begin with a tape measure, not a screwdriver. Measure the height, width and depth of each large piece, then measure the route at both homes, including doorway widths, stairs, landings and tight turns. Allow extra room for protective wrapping and for people to manoeuvre, because a wardrobe that clears a doorframe by a few millimetres won’t clear it once padded.
If a sturdy piece fits the route and can be handled safely, leave it intact. Where it doesn’t, remove only what reduces bulk, weight or vulnerable projections, such as legs, doors or loose shelves, and stop there.
The trade-off is joint damage. Older particleboard and flat-pack furniture that has been assembled more than once can have worn fixing holes and fragile connectors, so taking it apart again may weaken it more than carrying it whole would. Before undoing anything, check the manufacturer instructions and the construction. Bolt-together components may be designed to come apart, but glued joints, integral backs and fitted units must never be forced.
Prepare a parts-tracking system and protect the finishes
Empty every piece first, then set up a clear, padded working area on a blanket or rug. Gather correctly sized screwdrivers, Allen keys or spanners, and have a helper ready to support sections as they come free. Heavy components need appropriate professional assistance, not a second pair of hands and optimism.
Photograph the whole piece, each connection and the orientation of every panel, both before you start and as you go. Identify matching parts with discreet tie-on labels or labelled wrapping rather than marking visible surfaces. Bag fixings by furniture item and by assembly stage, keep washers and brackets with the screws they belong to, and label each bag clearly. Store all the bags together in one dedicated container, and don’t tape them to finished surfaces, because adhesive can lift lacquer, veneer and polish.
Wrap panels separately in clean, non-abrasive padding and add corner protection. Keep hardware away from timber, lacquer, veneer and upholstery, and secure wrapping to itself rather than to the furniture.
Identify mirrors, glass and stone before work begins, since these are higher-risk components that need suitable protective packaging and secure support in transit. If a piece is large or bonded, or you’re unsure how it is fixed, leave it to experienced handlers rather than improvising.
How to dismantle furniture for moving: beds, wardrobes, dining tables and shelving
Treat the following as a guide to what to remove and where to stop; the manufacturer’s instructions always decide the actual sequence.
Beds: remove bedding and the mattress, then drawers and slats where the design specifies. Support the side rails and headboard before releasing their fixings, label rail orientation, and bundle protected slats together. Leave powered or complex mechanisms to suitably experienced professionals.
Wardrobes: take out loose shelves and rails first, then doors only if necessary and only while supported. Dismantle the carcass when its construction and your access route justify it, remembering that a thin back panel often provides structural bracing. Wrap mirrored doors separately, and never treat fitted wardrobes as freestanding flat-pack units.
Dining tables: remove loose extension leaves, and take off bolt-on legs only where they’re designed to detach, with the top fully supported. Protect the top and the leg ends separately. Don’t twist glued legs free, and don’t attempt to remove glass or stone tops without proper support.
Shelving: lift out loose shelves and keep the shelf pins in labelled bags. Separate modular sections only at their intended connectors, and keep glued or fixed carcasses whole where it’s safe to do so. Support tall units while releasing wall anchors, and protect vulnerable panel edges and thin backs.
How to dismantle furniture for moving: beds, wardrobes, dining tables and shelving
Arrange removalist dismantling before the work exceeds your limits
Set your DIY boundary at simple, clearly documented furniture that you can support safely with suitable tools and a helper. Stop if joints resist, fixings are damaged, the structure becomes unstable or the next step is unclear. Heavy, fragile, antique, fitted or mechanically complex pieces are better assessed first, and some need a furniture specialist, installer or other qualified tradesperson rather than a standard removal crew.
If you plan to hand the job to your removalists, don’t assume it comes with the move. Adlam Transport’s guidance on whether moving companies will dismantle furniture for you is a useful starting point, but dismantling and reassembly should be agreed in advance rather than taken for granted.
Before moving day, send photographs, dimensions and construction details of the pieces in question. Then confirm which items and components the crew will dismantle and rebuild, any applicable charges and exclusions, any specialist requirements, and whether re-anchoring to walls is covered.
Reassemble in the intended room, then check before use
Carry the protected components into their final room before you rebuild, with enough space to work. That way you avoid dragging assembled furniture across floors or through narrow doorways.
Follow the manufacturer instructions, your photographs and your labels rather than memory, and check panels, joints and fixings for damage before you proceed. Support sections while joining them. Start threaded fixings loosely, align and square the structure, then tighten progressively as instructed, taking care not to overtighten or strip particleboard holes.
Refit shelves, doors and other removable parts, then check alignment and stability. If the piece rocks, joints stay loose or components no longer fit properly, stop and investigate before going further.
Finally, restore any wall anchoring the manufacturer requires, using fixings suited to the new wall, before loading or using the furniture. If anchoring or structural repair is beyond your skills or outside the agreed removalist scope, arrange suitable help first.

